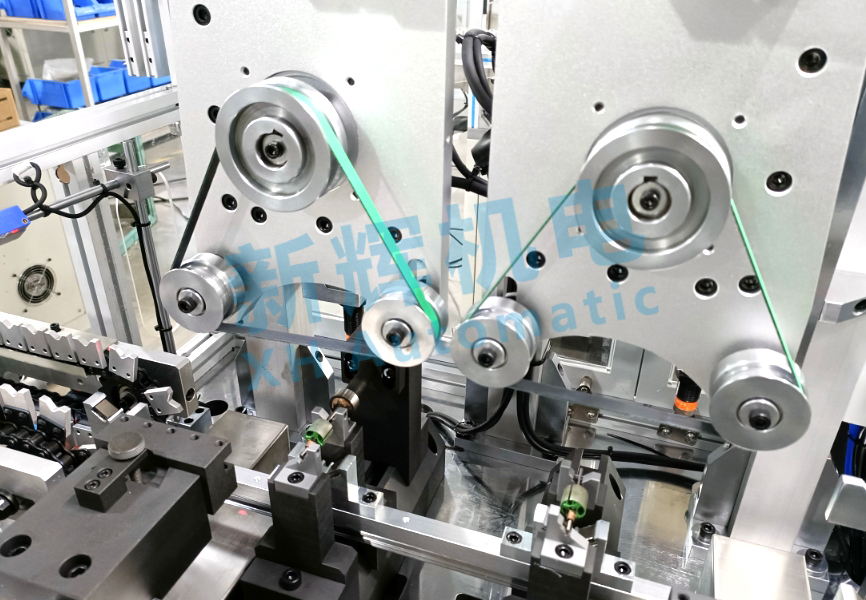
What are the common mechanical failures and solutions for motor motor rotor automatic duplex fine-turning machine?
Motor motor rotor automatic duplex fine-turning machine common mechanical failures and solutions:
First, the tooling system failure
l Failure phenomenon
Tool wear is too fast: in the fine turning process, the cutting edge of the tool is quickly worn, resulting in a decline in the quality of the machined surface, the dimensional accuracy can not be guaranteed.
Tool chipping: the cutting edge of the tool is chipped, resulting in scratches, burrs and other defects on the surface of the machined rotor.
Tool installation is not firm: tool loosening in the process of machining, affecting the machining accuracy, and may even lead to tool damage and workpiece scrap.

l Possible reasons
Cutting parameters are unreasonable: cutting speed, feed, depth of cut and other parameters are not set properly, so that the tool is subjected to excessive cutting force, accelerating tool wear or lead to chipping.
Tool quality problems: the material of the tool itself, hardness, toughness, etc. does not meet the processing requirements, or there are defects in the manufacturing process of the tool.
Tool installation problems: the tool is installed in an incorrect way, the clamping force is insufficient or the installation fixture is worn, resulting in the installation of the tool is not solid.
l Solution
Optimization of cutting parameters: According to the material of the rotor, machining accuracy requirements and other factors, reasonably adjust the cutting speed, feed and depth of cut. You can refer to the recommended values of cutting parameters provided by the tool manufacturer and optimize them through trial cutting.
Selection of tools with qualified quality: Select tools that match the machining material and process, and check the quality certification and user evaluation of the tools. For important machining tasks, use tools of well-known brands and high performance.
Install the tool correctly: follow the installation instructions of the tool and equipment to ensure that the tool is installed in place, use the right tool to tighten the tool and ensure sufficient clamping force. Regularly check the wear of the tool mounting fixture, if any wear and tear timely replacement.
Second, the fixture system failure
l Failure phenomenon
The fixture can not accurately clamp the rotor: resulting in rotor displacement during machining, affecting the machining accuracy, and may even cause the workpiece to be scrapped.
Inaccurate positioning of the fixture: the machining position of the rotor is deviated, such as eccentricity, axial offset, etc., which can not meet the requirements of machining accuracy.
Wear of fixture: The clamping part, positioning pin and other parts of the fixture are worn out, affecting the performance and service life of the fixture.
l Possible reasons
Problems with the mechanical structure of the fixture: failure of the transmission mechanism of the fixture (e.g., screws, cylinders, hydraulic cylinders, etc.), resulting in insufficient clamping force or inability to clamp properly.
Failure of the positioning system: the positioning pin is worn, the positioning surface is not flat or the positioning sensor is out of order, which affects the positioning accuracy of the fixture.
Long-term use and wear: After a large number of machining operations, the clamping parts and other key components of the fixture are worn out due to frequent friction.
l Solution
Check the mechanical structure of the fixture: Repair or replace the faulty drive mechanism, such as repairing the threads of the screw, replacing damaged cylinders or hydraulic cylinders. Ensure that the clamping force of the fixture meets the machining requirements, which can be checked with tools such as pressure sensors.
Maintain the positioning system: replace the worn positioning pins, repair or grind the positioning surface to make it flat and smooth. Check the working condition of the positioning sensors, calibrate or replace faulty sensors.
Regular inspection and maintenance of fixtures: establish a regular inspection system for fixtures to find out the wear of fixtures in time. Repair or replace the worn parts, such as replacing the wear-resistant bushings in the clamping part, repairing the surface coating of the fixture, etc.
Third, the feed system failure
l Fault phenomenon
Uneven feeding: In the process of fine turning, the feeding speed of the tool is unstable, resulting in ripples and increased roughness of the machined surface.
Feed movement stagnation: the tool can not smoothly feed the movement, the phenomenon of stopping or jumping, affecting the processing quality and efficiency.
Feed accuracy is too poor: the actual feed amount is not consistent with the set value, resulting in machining size deviation, unable to meet the accuracy requirements.
l Possible reasons
Failure of feed drive components: wear and tear, loose or poor lubrication of screws, guide rails, couplings and other drive components, affecting the smoothness of the feed movement.
Problems of feed motor and driver: the performance of feed motor is degraded, the parameters of driver are wrongly set or the control signal is abnormal, resulting in abnormal feed movement.
Load change: In the process of machining, the uneven material of the workpiece, tool wear and other factors lead to changes in the cutting force, causing changes in the load of the feeding system, which in turn affects the feeding accuracy.
l Solution
Check the feed drive components: regularly check the wear of the screw, guide rail, for slight wear can be repaired by adjusting the gap, re-lubrication, etc.; for serious wear parts, should be replaced in a timely manner. Check whether the coupling is loose, re-tighten or replace it if it is loose.
Check the feed motor and drive: test the performance of the feed motor, such as speed, torque and other parameters, and repair or replace the motor with reduced performance. Check whether the parameters of the drive are set correctly, such as pulse equivalent, speed control mode, etc. Use tools such as oscilloscope to check whether the control signal is normal.
Respond to load changes: Optimize the cutting parameters, select the appropriate tool and cutting mode, and reduce the cutting force changes caused by factors such as workpiece material and tool wear. Set up appropriate overload protection and compensation mechanisms in the feed system, such as the use of ball screw sub-tensioning device to improve the rigidity of the system, or through software compensation to correct the feed accuracy deviation.
Fourth, the spindle system failure
l Fault phenomenon
Excessive spindle vibration: During the machining process, the spindle has obvious vibration, resulting in poor machining surface quality and shortened tool life.
Spindle speed instability: the actual spindle speed does not match the set speed, or the speed fluctuates greatly, affecting the machining accuracy.
Spindle accuracy decreases: the spindle's radial runout, axial runout and other accuracy indexes are out of the permissible range, resulting in poor dimensional accuracy and form accuracy of the machined rotor.
l Possible reasons
Wear of spindle parts: Wear of bearings, journals and other parts of the spindle leads to a decrease in the rotational accuracy of the spindle and an increase in vibration.
Dynamic balancing problem: The tool or fixture mounted on the spindle or the rotor itself is unbalanced, causing the spindle to vibrate.
Failure of the drive system: Failure of the spindle motor, frequency converter or other drive devices, resulting in unstable spindle speed.
l Solution
Check the wear of the spindle parts: Use a percentage table or other tools to measure the radial runout and axial runout of the spindle to determine the wear of the bearings and journals. For the parts with serious wear, replace the bearings or repair the journals in time.
Solve dynamic balance problems: Conduct dynamic balance tests on components installed on the spindle, and for unbalanced components, balance them by adding counterweights or adjusting the installation position. Regularly check and maintain the dynamic balance of the rotor to ensure the balance of the rotor during machining.
Check the drive system: check the working condition of the spindle motor, including the winding resistance, insulation resistance and other parameters of the motor. Check the parameter settings and output signals of the frequency converter or other driving devices, and repair or replace them in case of failure.


