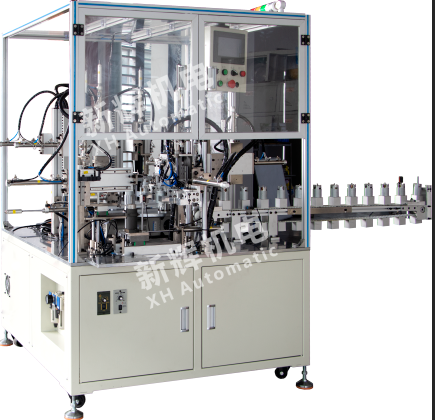
What are the common sensor failures and their solutions for DC motor motor fully automatic rear end dielectric assembly machine?
1, photoelectric sensor failure
Failure phenomenon
Signal no output or output abnormal: In the meson into the assembly position or other critical links, the photoelectric sensor should produce a signal, but there is no output, or the output signal is unstable and wrong. This may be caused by the optical path is blocked, the light source or receiver is damaged, the sensor's internal circuit failure and other reasons.
Deterioration of detection accuracy: The sensor's detection accuracy of the position and shape of the meson deteriorates, resulting in an inaccurate assembly position. This may be caused by factors such as dirty lenses, shifted mounting positions, or aging sensors.
Solution
Check the optical path and clean the lens: First check whether the optical path is obscured by dust, oil, debris, etc.. If so, carefully clean the optical path and lens, either with a clean soft cloth or compressed air. For hard-to-clean dirt, you can use an appropriate cleaner, but be careful to avoid damaging the lens.
Check the installation position and recalibration: Make sure that the sensor is installed in the correct position, and check whether its relative position and angle to the detected meson meet the requirements. If the position is shifted, readjust the mounting position according to the device's installation instructions and perform calibration. The calibration process may require the use of standard calibration tools or reference parts to ensure that the sensor can detect accurately.
Checking and replacing internal components: If the above methods do not solve the problem, there may be a malfunctioning light source, receiver, or circuit inside the sensor. A tool such as a multimeter can be used to check the electrical parameters of the sensor, such as the supply voltage and output signal voltage. If it is determined that the internal components are damaged, you need to replace the entire photoelectric sensor or damaged component parts.
2, proximity sensor failure
Failure phenomenon
Can not sense the object: the proximity sensor in the meson close to no response, can not normally trigger the signal. This may be due to the sensing surface is covered, the sensing distance is not set properly, the sensor is damaged and other reasons.
False trigger signal: in the absence of meson close to the case, the sensor but generated a signal, which may be due to electromagnetic interference, sensor sensitivity is set too high or the sensor itself caused by failure.
Solution
Clean the sensing surface and adjust the distance: Check whether the sensing surface of the sensor is covered with dirt, grease, etc., and wipe it clean with a clean cloth. At the same time, check whether the sensing distance meets the requirements, according to the specifications of the sensor, adjust the parameter settings of the sensing distance to ensure that it can accurately sense the meson within the appropriate distance.
Check electromagnetic interference and sensitivity settings: If the sensor appears to be false trigger signal, first consider whether the electromagnetic interference from the surrounding equipment. Remove equipment around the sensor that may be causing interference or take electromagnetic shielding measures, such as using shielded wires to connect the sensor. In addition, check the sensitivity setting of the sensor, if the setting is too high may lead to false triggering, you can reduce the sensitivity appropriately until the accurate sensing effect is achieved.
Replacement of the sensor: If the sensor still does not work properly after the above treatment, the internal components may be damaged and need to be replaced with a new proximity sensor.
3, pressure sensor failure (if there is a pressure detection link in the assembly process)
Failure phenomenon
Abnormal pressure readings: the pressure value displayed by the pressure sensor does not match the actual assembly pressure, which may be too high, too low or fluctuate greatly. This may be caused by shock to the sensor, damage to the sensor element, blockage or leakage of the connecting piping.
No Pressure Signal Output: There is no signal from the sensor when there should be a pressure signal output during assembly, which may be caused by a power failure, a broken signal line, or damage to the sensor's internal circuitry.
Solution
Check connecting piping and sensor components: For abnormal pressure readings, first check whether the piping connecting the pressure sensor is clogged, leaking or bent. If so, clean the line or replace the damaged part of the line. At the same time, check the sensor's sensing element for signs of damage, such as distortion, rupture, etc. If damage to the element is found, the pressure sensor needs to be replaced.
Check the power supply and signal line: when there is no pressure signal output, first check whether the power supply of the sensor is normal, including whether the power supply voltage meets the requirements and whether the fuse is blown. Then check whether the signal line is disconnected, short-circuited or in poor contact, use a multimeter to check the line. If it is a line problem, repair or replace the line; if the line is normal, it may be the sensor internal circuit failure, need to replace the sensor.
4, encoder failure (used to measure the position and speed of the motor shaft or mechanical arm and other rotating parts)
Failure phenomenon
Inaccurate position or speed measurement: the position information fed back by the encoder does not match the actual position, or the speed measurement value has deviation, which leads to problems in motion control of the assembly machine, such as uncoordinated assembly movements and unstable speed.
Signal loss or interruption: During operation, the encoder suddenly stops outputting signals so that the control system cannot obtain position and speed information, and the machine may alarm and stop working.
Solution
Check the connecting line and interface: Firstly, check whether the connecting line of the encoder is loose, broken or with poor contact. Check the line interface for oxidation, corrosion, etc. If so, clean the interface or replace the connection plug. After ensuring that the wiring is securely connected, restart the machine to see if the fault is resolved.
Recalibrate the encoder: If the position or speed measurement is inaccurate, the encoder can be recalibrated using professional calibration tools and equipment. The calibration process needs to be carried out according to the encoder model and equipment requirements, and usually includes steps such as setting the zero position and determining the correspondence between the number of pulses and the actual position.
Checking and replacing the encoder: If the loss or interruption of the signal occurs frequently and cannot be solved after the checks and treatments described above, it is possible that the photoelectric element, the code disk or the circuitry inside the encoder has failed. In this case, it is necessary to replace the encoder with a new one and re-install and re-calibrate it.
※ If you still can't solve the problem by the above ways and means, please contact the technical specialists of Xinhui Electromechanical Equipment Co.